-
Shop Parts
- Shop Accessories
- Shop Overland
-
Shop by Vehicle
![Select Vehicle]() Select Your Vehicle
Select Your Vehicle - Videos & Resources
Sign in to my account
Instructions
Heater Blower Motor Kit for Range Rover Classic
Applies To:
Item: 8844
Fits: Range Rover Classic | '90 - '94
Heater Box Rebuild
1. Remove the right and left plastic foot-well ducts. (shown after removal in photo 51)
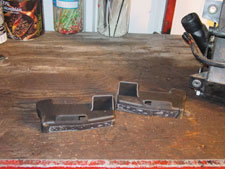
Photo 51
2. Remove the gaskets surrounding the fresh air inlet and the blower output. (See photos 52 and 53)
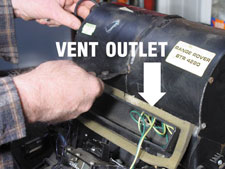
Photo 52
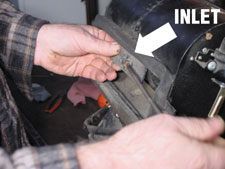
Photo 53
3. Drill out the 2 rivets on the left half of the heater enclosure holding the heater control assembly to the plastic heater housing with a 3/16 inch drill bit. (See photos 54 and 55)
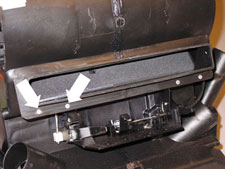
Photo 54
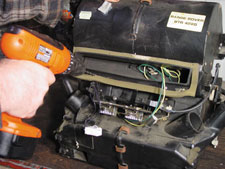
Photo 55
4. Release the adjuster on the left side of the heater control cluster, marking it first so you know the correct position for reassembly. (Photo 56 shows the marking, photo 57 shows the retaining door popped open, and photo 58 shows the shaft being dislocated from the plastic block).
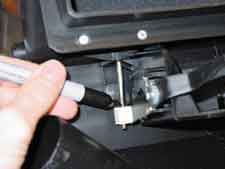
Photo 56
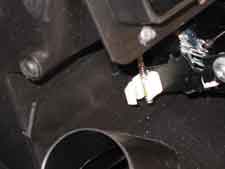
Photo 57
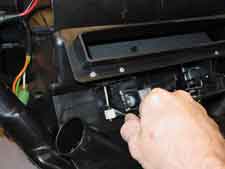
Photo 58
5. Remove the 10 clips and the 2 snap rings holding the halves together. Note: There is a clip hidden behind the heater control cluster. (See photos 59, 60 and 61)
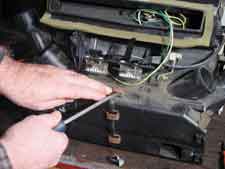
Photo 59
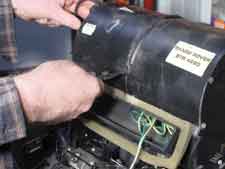
Photo 60
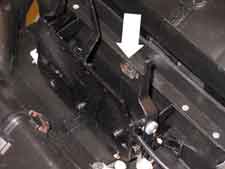
Photo 61
6. Remove the 2 screws holding the halves together. (See photo 62)
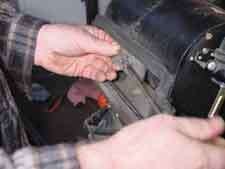
Photo 62
7. Remove the 2 screws securing the Recirculation Door Flap Actuator and dislocate the control arm by removing push clip from bell crank. (Shown in photos 63 and 64)
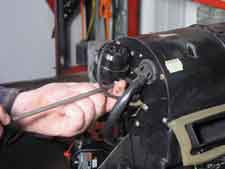
Photo 63
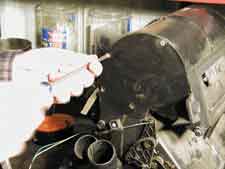
Photo 64
8. Remove the screws securing the side plates (6 screws per side). (See removal of the right end plate in photo 64) Remove the resistor from the heat shield as shown in photo 65.
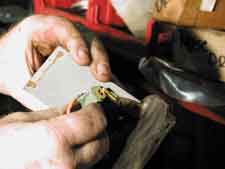
Photo 65
9. CRITICAL STEP: Move the Fresh Air Flap fully closed and pry it so that it lines up with the "V" shaped opening in the right half of the unit. (The "V" is shown in photo 66, and prying techniques are shown in photos 67 and 68) If the flap is not in line with the "V" channel, the halves will not come apart, and you risk damaging the flap.
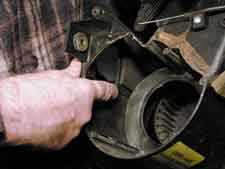
Photo 66
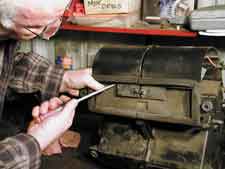
Photo 67
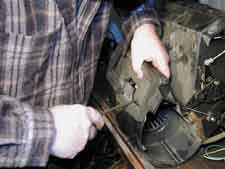
Photo 68
10. Slide the halves of the heater box apart.
11. Remove the foam gasket around the 2 heater core pipes and remove the top flap. (See photo 69)
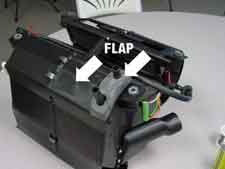
Photo 69


What Our Customers Are Saying


