-
Shop Parts
- Shop Accessories
- Shop Overland
-
Shop by Vehicle
![Select Vehicle]() Select Your Vehicle
Select Your Vehicle - Videos & Resources
Sign in to my account
Air Lift Load Controller II Kit Installation Instructions
Applies To:
Item: #9264
Fits: All
This part of the installation should be done after the air spring kit is installed.
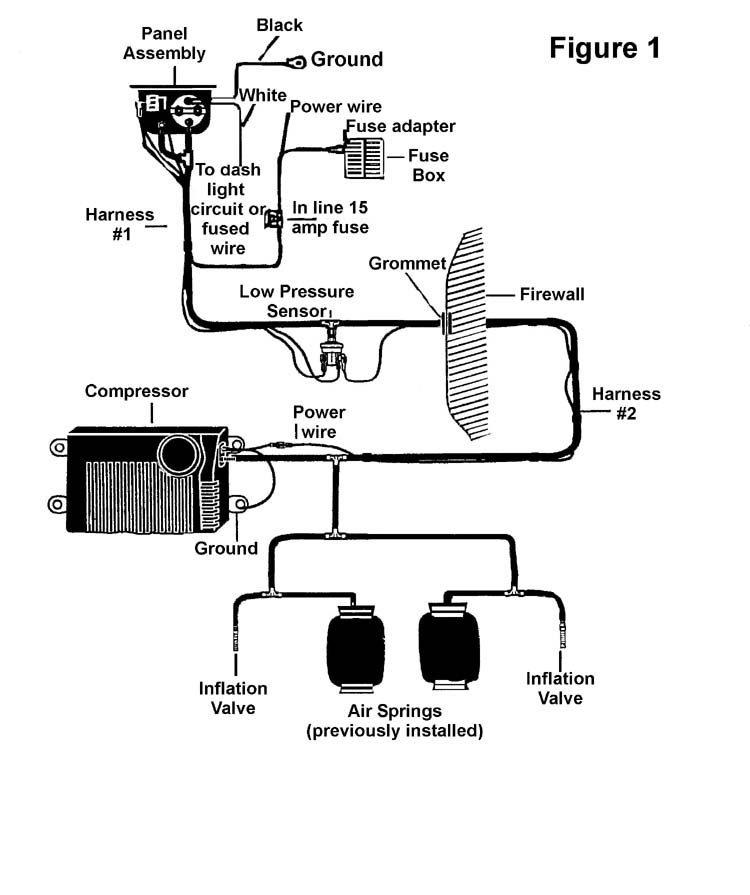
If you are adding this control system to an Air Lift Super Duty application, then no modifications to the Low Pressure Sensor are necessary. If you are adding this control system to an Air Lift 1000 or Ride Control application, and if your specific application requires a minimum of 10 p.s.i, then it will be necessary to adjust the Low Pressure Sensor to 10 p.s.i. To increase to pressure in the Low Pressure Sensor, remove the rubber plug with pliers (Figure 2). Using an Allen wrench, turn the screw clockwise 4-1/4 turns (Figure 3). Push rubber plug back into the top of the Low Pressure Sensor. Proceed with the step-by-step installation instructions.
Do not cut, trim, modify, or disassemble the harness. If you have excess length, simply coil it up and secure out of the way with the provided tie straps.
IMPORTANT: All preassembled gauge panels have been 100% leak & function tested. DO NOT attempt to tighten, loosen, or adjust any fittings or connections. This will likely cause a leak or malfunction and void the warranty.

What Our Customers Are Saying


