nothing
Cart Summary

0 items in your cart

Your cart is empty.

Subtotal: $0.00

CHECKOUT NOW

Atlantic British Logo


cart

800-533-2210

M-F 8am - 6pm Eastern or Email Us

Sign in to my account

I forgot my password. Checkout as a Guest

Welcome!

Instructions

Heater Blower Motor Kit for Range Rover Classic

Applies To:

Item: 8844
Fits: Range Rover Classic | '90 - '94

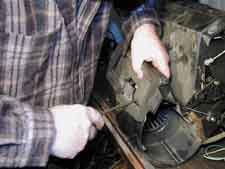
Heater Box Rebuild

1. Remove the right and left plastic foot-well ducts. (shown after removal in photo 51)
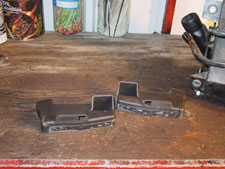
right and left plastic foot-well ducts
Photo 51

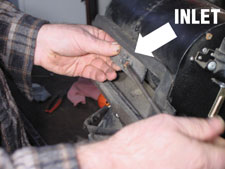
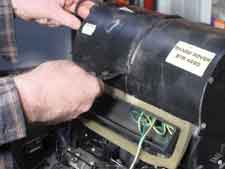
2. Remove the gaskets surrounding the fresh air inlet and the blower output. (See photos 52 and 53)
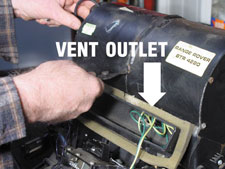
vent outlet
Photo 52

vent inlet
Photo 53

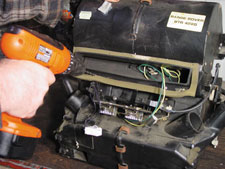
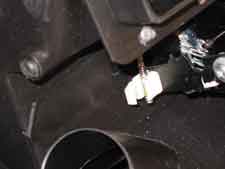
3. Drill out the 2 rivets on the left half of the heater enclosure holding the heater control assembly to the plastic heater housing with a 3/16 inch drill bit. (See photos 54 and 55)
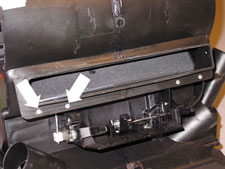
2 rivets on the left half of the heater
Photo 54

drilling rivets
Photo 55

4. Release the adjuster on the left side of the heater control cluster, marking it first so you know the correct position for reassembly. (Photo 56 shows the marking, photo 57 shows the retaining door popped open, and photo 58 shows the shaft being dislocated from the plastic block).
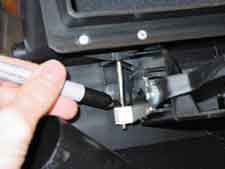
marking adjuster on the left side of the heater control cluster
Photo 56

retaining door popped open
Photo 57

shaft being dislocated from the plastic block
Photo 58

5. Remove the 10 clips and the 2 snap rings holding the halves together. Note: There is a clip hidden behind the heater control cluster. (See photos 59, 60 and 61)
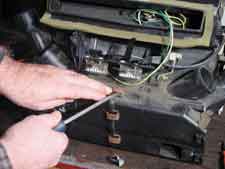
Remove the 10 clips and the 2 snap rings holding the halves together
Photo 59

Remove the 10 clips and the 2 snap rings holding the halves together
Photo 60

Remove the 10 clips and the 2 snap rings holding the halves together
Photo 61

6. Remove the 2 screws holding the halves together. (See photo 62)
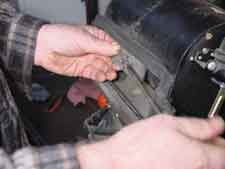
Remove the 2 screws holding the halves together
Photo 62

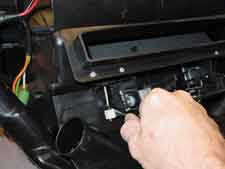
7. Remove the 2 screws securing the Recirculation Door Flap Actuator and dislocate the control arm by removing push clip from bell crank. (Shown in photos 63 and 64)
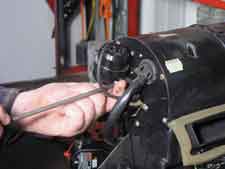
Recirculation Door Flap Actuator
Photo 63

removing push clip from bell crank
Photo 64

8. Remove the screws securing the side plates (6 screws per side). (See removal of the right end plate in photo 64) Remove the resistor from the heat shield as shown in photo 65.
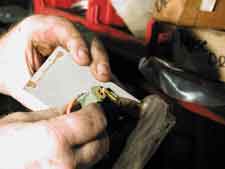
Remove the resistor from the heat shield
Photo 65

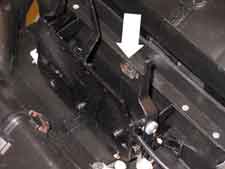
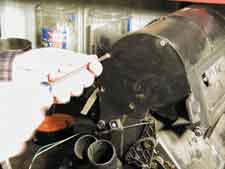
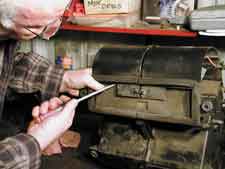
9. CRITICAL STEP: Move the Fresh Air Flap fully closed and pry it so that it lines up with the "V" shaped opening in the right half of the unit. (The "V" is shown in photo 66, and prying techniques are shown in photos 67 and 68) If the flap is not in line with the "V" channel, the halves will not come apart, and you risk damaging the flap.
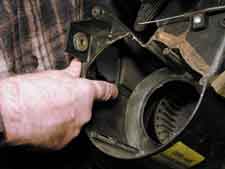
Fresh Air Flap fully closed
Photo 66

Prying Fresh Air Flap
Photo 67

Prying Fresh Air Flap
Photo 68

10. Slide the halves of the heater box apart.

11. Remove the foam gasket around the 2 heater core pipes and remove the top flap. (See photo 69)
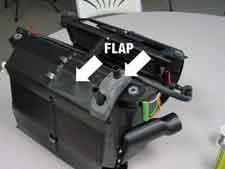
location of top flap on heater core pipe
Photo 69

previous page arrow 1 2 3 4 5 6 7 8 9 10 11 12 13 14 15 16 Next Page

Complete Product Instructions List Page

Select a Category
Select Vehicle Select Your Vehicle

What Our Customers Are Saying

EXCELLENT
4.9
2,196
Average
Reviews

Great product selection, great customer service!

Jose V.
El Paso, TX

4-30-24

Every time I have ordered parts for my 2008 Range Rover Sport, my sales rep has been so helpful and gets my order sent out quickly.

Anita B.
Newport News, VA

4-29-24

A wide variety of LR parts, very responsive and congenial customer service, and fast turn around from order to shipping.

James C.
APO, AP, CA

4-28-24

You’re my go to for D2 parts and the repair videos

Adam P.
GARDNER, KS

4-28-24

Professional customer service and excellent delivery on orders.

JEFFREY F.
GROVETOWN, GA

4-27-24

Great service and great parts

Jay M.
Verona, VA

4-22-24

You guys have great customer service and have always been able to get me the parts I need.

Derrick C.
Dallas, TX

4-17-24

Professional and knowledgeable sales representatives, quick shipping, reasonable selection, and competitive pricing.

Michael S.
Mesa, AZ

4-17-24

My sales rep is very knowledgeable and very pleasant to work with

Roy V.
Middletown, NY

3-27-24

Item was delivered as described, shipped out immediately, I had my parts in 2 days.. Very Much Recommended !!

MR S.
BURR OAK, MI

3-27-24

Reviews from our Customers...

  • FAST Shipping! Call these Folks they have all the answers to your part installation.

    -Bill M. (Boydton,VA)

    Great customer service, very knowledgeable staff. Everyone I have worked with are Land Rover owners- which is a big help for knowing the vehicles.

    You always have the parts I need at a great price and everyone Ive ever spoken to has a great knowledge of all Land Rovers

    -Keith B. (Blue Ridge,VA)

    Professionalism. My sales rep is a rock star, and I value both his technical expertise and his knowledge of your product line.

    -Alan R. (N. Chelmsford,MA)

  • You always have the parts I need at a great price and everyone Ive ever spoken to has a great knowledge of all Land Rovers

    -Keith B. (Blue Ridge,VA)

  • Professionalism. My sales rep is a rock star, and I value both his technical expertise and his knowledge of your product line.

    -Alan R. (N. Chelmsford,MA)

SIGN UP for Exclusive Offers and Latest Deals

Ask a Question
Notify me when item number is back in stock!
Choose email or text alert (or both.)